I. Introduction
A. Importance of Chain Maintenance
Bicycle Chain Cleaner is a crucial aspect of bike care that is often overlooked. The chain plays a pivotal role in the bike’s propulsion system, transferring power from the rider’s pedaling to the wheels. A clean and well-maintained chain ensures smooth gear shifting, efficient power transfer, and an overall enjoyable riding experience. Neglecting chain maintenance can lead to accelerated wear and tear, decreased performance, and the need for costly repairs or replacements.
B. Benefits of Using a Bicycle Chain Cleaner
Using a dedicated bicycle chain cleaner offers several advantages over traditional cleaning methods. A chain cleaner provides a more thorough and efficient means of removing dirt, grime, and old lubricant from the chain. This not only helps to prolong the life of the chain but also contributes to smoother gear transitions and a quieter ride. Additionally, the use of a chain cleaner reduces the effort and time required for maintaining the chain compared to manual cleaning methods, making it a convenient and effective tool for cyclists.
II. How to Use a Bicycle Chain Cleaner
A. Preparing the Bicycle and Workspace
Before using a bicycle chain cleaner, it’s important to prepare the bike and the surrounding workspace. Start by mounting the bike onto a work stand or securing it in a stable position. This allows for easy access to the chain and minimizes the risk of the bike tipping over during the cleaning process. Gathering all the necessary tools and materials, such as the chain cleaner, degreaser, brushes, and rags, will streamline the cleaning process and make it more efficient.
B. Applying the Chain Cleaner
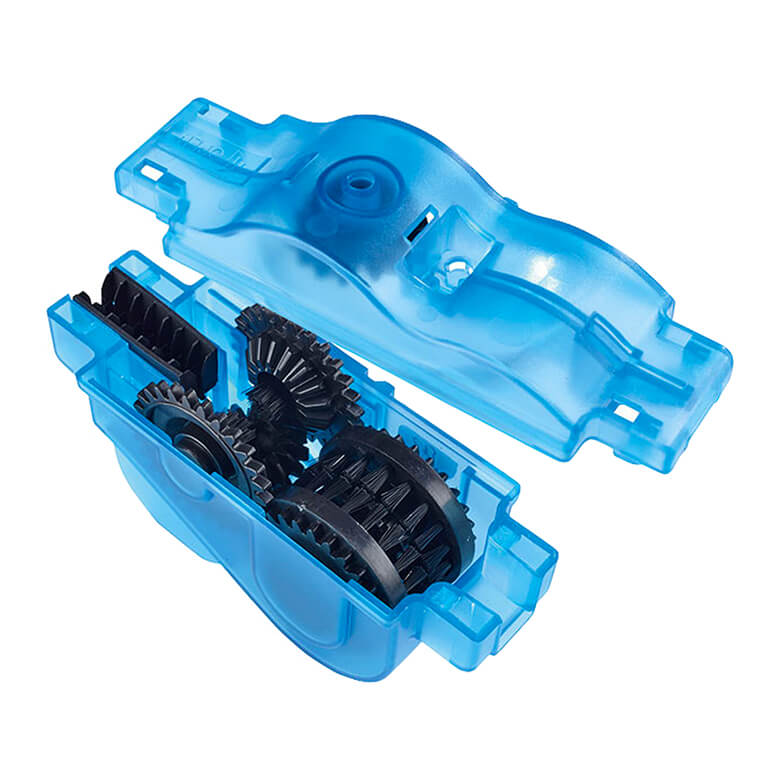
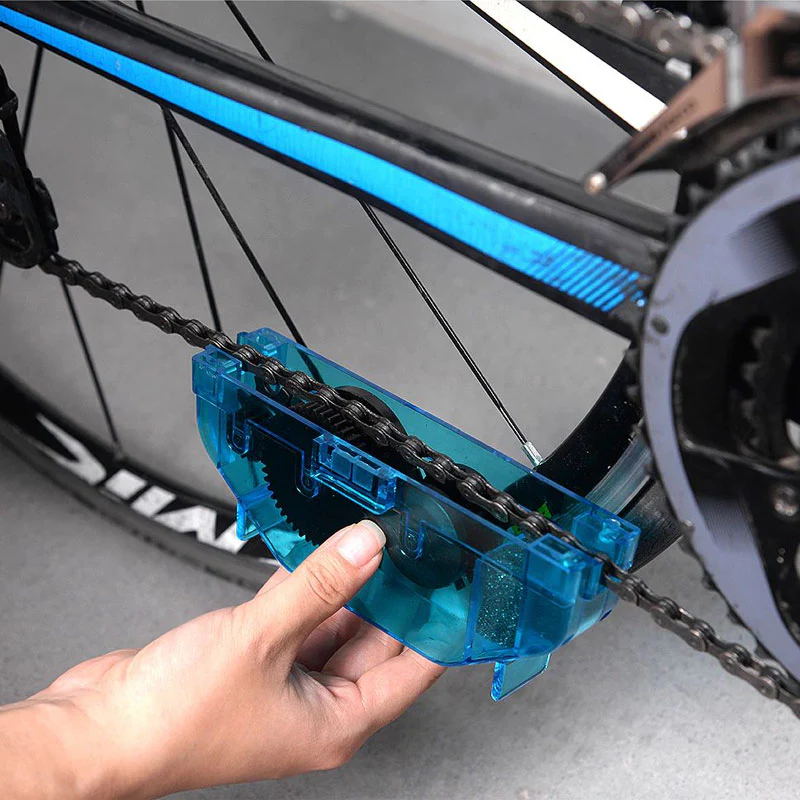
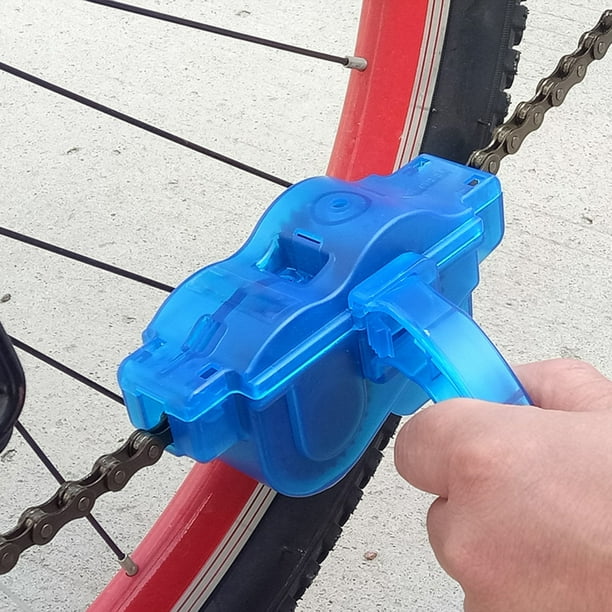
The application of the chain cleaner is a critical step in the cleaning process. Begin by carefully positioning the chain cleaner tool over the lower section of the bicycle chain. Most chain cleaners feature a series of rotating brushes or sponge wipers that come into contact with the chain as it passes through the cleaner. With the chain cleaner in place, engage the pedals in a reverse motion to guide the chain through the cleaner. This action ensures that the entire length of the chain comes into contact with the cleaning brushes or wipers, effectively removing accumulated dirt and grime. Repeat the process as necessary, gradually working around the entire length of the chain to ensure thorough cleaning.
As the chain passes through the cleaner, the brushes or wipers agitate the degreasing solution, efficiently breaking down and removing contaminants from the chain. As a result, the chain emerges cleaner and free from built-up grime, preparing it for the next steps in the cleaning process.
III. Step-by-Step Cleaning Process
A. Removing Dirt and Grime
After using the bicycle chain cleaner to remove most of the old lubricant and surface dirt, it’s important to address any remaining grime. For this step, a degreaser is often used, applied directly to the chain. Degreasers are formulated to break down stubborn dirt, grease, and oil, allowing them to be easily wiped away. To start, apply the degreaser to the chain, using a dedicated brush to work the solution into the nooks and crannies of the chain. As the degreaser penetrates the chain, it will lift and loosen embedded dirt and grime, facilitating its removal.
Once the degreaser has been applied and the dirt and grime have been successfully loosened, use a clean, lint-free rag to thoroughly wipe down the chain. Ensure that all degreaser and residual dirt are removed from the chain, leaving it clean and ready for the next steps in the maintenance process. Properly removing dirt and grime is crucial for ensuring optimal performance and longevity of the chain.
B. Rinsing and Drying the Chain
Following the application of the degreaser and the removal of dirt and grime, the next step is to rinse and dry the chain. Use a mild, soapy solution and a sponge or cloth to gently wash the chain, ensuring that any remaining degreaser and contaminants are completely removed. Thoroughly rinse the chain with clean water to eliminate any soap residues.
Once the chain has been rinsed, it’s important to ensure that it is thoroughly dried to prevent the formation of rust and corrosion. Alternatively, allowing the chain to air dry completely is also an effective method. However, it’s important to apply lubricant promptly after drying to protect the chain from any potential rusting.
IV. Lubricating the Chain
A. Choosing the Right Lubricant
Selecting the appropriate lubricant is crucial for ensuring the optimal performance and longevity of the bicycle chain. There are various types of chain lubricants available, each tailored to specific riding conditions and preferences. For example, wet lubricants are ideal for wet and muddy conditions, while dry lubricants are suitable for drier environments.
When applying lubricant to the chain, avoid over-lubrication, as this can attract dirt and debris, leading to accelerated chain wear. It’s important to strike a balance between applying sufficient lubricant to ensure smooth operation and avoiding excess that can lead to a buildup of grime and dirt.
B. Proper Application Technique
To apply the lubricant, place a drop of lubricant on each roller of the chain while slowly rotating the pedals in a reverse motion.Continue to apply the lubricant along the length of the chain, ensuring thorough coverage.
Once the lubricant has been applied, use a clean rag to wipe off any excess lubricant from the chain. This step helps to prevent the accumulation of dirt and debris, ensuring that the chain remains clean and efficient.
V. Maintenance Tips for Prolonging Chain Life
A. Cleaning Frequency
Maintaining a clean and well-lubricated chain is essential to prolong its life and ensure optimal performance. The frequency of chain cleaning depends on several factors, including riding conditions, weather, and the type of lubricant used. As a general rule of thumb, it’s advisable to clean and lubricate the chain every 100-150 miles (160-240 kilometers) under typical riding conditions. However, riders should consider more frequent cleaning in adverse weather conditions, such as rain or mud, which can increase the accumulation of dirt and grime on the chain. Regular inspections and cleaning can help prevent premature wear and tear, preserving the chain’s lifespan and maintaining smooth, efficient pedaling.
B. Signs of Chain Wear
Monitoring the condition of the bicycle chain is essential for detecting signs of wear and ensuring timely maintenance and replacement. Several indicators suggest that a chain may be wearing out and in need of attention. One common method to assess chain wear is by using a chain wear indicator tool, also known as a chain checker. This tool measures the elongation of the chain, indicating if it has reached the point of wear that can negatively impact the gear cassette and chainrings.
Another visual cue to assess chain wear is by inspecting the chain for elongation and wear between the rollers. If the chain appears stretched, and the gaps between the rollers are visibly wider than new, it may be time for a replacement. Additionally, a worn chain may produce a “clunking” or “skipping” sensation during pedaling, indicating that the chain is no longer engaging smoothly with the gear cassette.
Conclusion
In conclusion, the proper use of a bicycle chain cleaner is pivotal in maintaining a bike’s chain and optimizing overall performance. By following the recommended steps for preparation and applying the chain cleaner, cyclists can ensure effective and efficient cleaning, leading to a smoother ride and prolonged chain life.